
If you caught the intro post, you already know this. This game has been sitting on my shelf for a long time. It was punched, looked at, respected… and quietly avoided. Every time I thought about diving in, the rulebook would stare back and I’d decide, “Yeah, maybe later.”

This time, I’m doing things differently. I’m breaking the ruleset down into layers. I’m just dealing with what’s right in front of me.
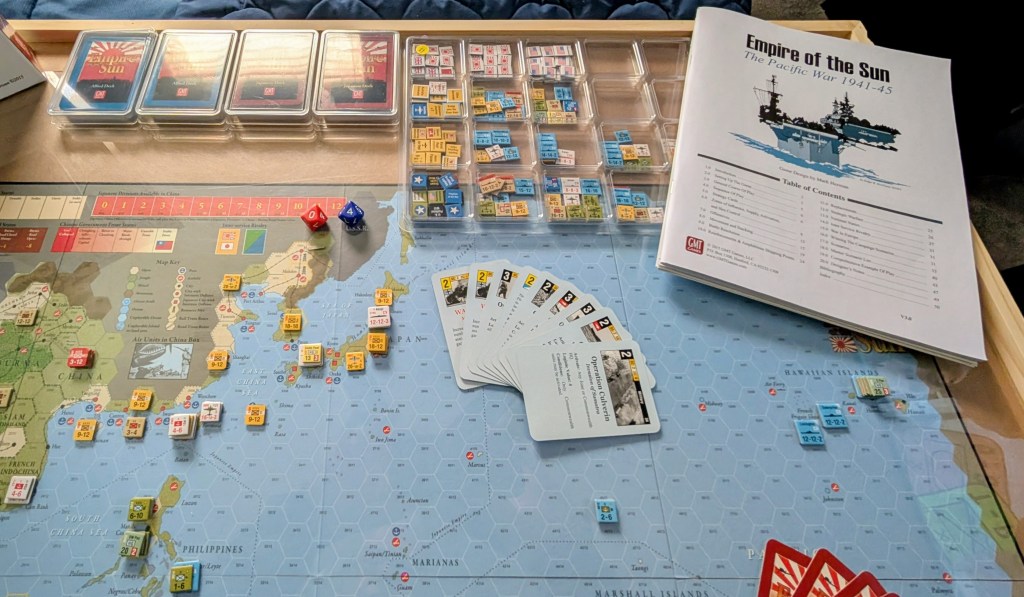
Late last night, I finally went ahead and set the game up. And I’ve got to say—it looks great on the table. The map is big and there are lots of pieces. It very much gives off that “this is going to be an experience” vibe once it gets rolling.
That said, I do have one early gripe: I wish the counters were a little bigger. There was a lot of information on them. My eyes aren’t getting any younger, so it took some effort to read the setup locations off the counters. Not a dealbreaker by any stretch—just something I noticed right away.
Today’s layer is pretty straightforward:

👉 Counters and Cards
I’m not worrying about how to use them yet.
I’m not trying to figure out how to win.
I just want to be allowed to look at the table and say, “Okay… I know what I’m seeing.”
And honestly? Just slowing down and doing that made the game feel way less intimidating.
When you first dump Empire of the Sun onto the table, it looks busy. Counters everywhere, cards with multiple values, symbols, ranges, and colors.
The key realization—right out of the gate—is this:
Everything on these components exists for a reason.
Nothing here feels ornamental. Dense? Yes. Random? No.
The first few pages of the rulebook are doing something important. They teach you how to read the game, not how to play it yet.
Let’s Talk Counters First
The counters represent ground, air, naval, and HQ units, and they cover everything from regiments to entire fleets. What stood out to me early is that the game embraces complexity. It doesn’t waste space.
Here’s what actually matters when you first pick one up:

The Numbers That Matter
On most combat units, you’ll see:
- Attack
- Defense
- Range (especially important for air and carriers)
That’s it. Everything else becomes relevant later, but these values are your entry point.
Setup vs Arrival
Some units have:
- A setup hex (they start on the map)
- Others have a game turn of arrival
This matters because Empire of the Sun is not a game where everything starts on the board. The war unfolds over time, and the counters reflect that pacing.
Pre-War Units
You’ll notice some units marked as pre-war. These can’t be replaced.
That alone tells you something important about the design:
- Early forces are valuable
- Losses actually matter
- This is not a game of endless recycling
Even before knowing the replacement rules, you can already feel the tension.
HQs: Quietly Important
HQ counters deserve special mention.
They don’t attack.
They don’t defend.
But without them, nothing really happens.
HQs control:
- Activation
- Range
- Supply eligibility
You don’t need to master HQ rules yet—just understand that they are the connective tissue of the entire system. If you’re wondering later why something can’t move or fight, the answer is often, “Because the HQ says no.”

Now the Big One: Strategy Cards
If Empire of the Sun were a movie, the counters would be the cast—but the cards are the script.
Right away, the rules make this crystal clear:
- There are two decks: Japanese and Allied
- Each side only plays their own cards
- Cards drive everything
Every Strategy Card has:
- A card type
- An Operations Value (1, 2, or 3)
- An Event
And here’s the rule that matters most, especially early:
If a card’s text contradicts the rules, the card wins.
That single sentence explains a lot about how this game wants to be played. The rules create the framework—but the cards shape the war.
What I’m Not Worrying About Yet
For Session 1, I intentionally ignored:
- Combat resolution tables
- Reaction cards
- Supply math
- Special cases and edge rules
Right now, the goal isn’t execution—it’s recognition.
I want to look at a counter and know what I’m seeing.
I want to look at a card and understand my options.
That’s it.
After spending time with just the counters and cards, Empire of the Sun already feels less intimidating.
The game isn’t asking you to memorize everything.
It’s asking you to learn how to read the system.
And once you do that, the rest has somewhere to land.
There are some great videos to help with learning the system. Harsh Rules does a great job!
Up Next: Playing the Comprehensive Example of Play
Next up, I’m going to do exactly what the rules recommend and play through the Comprehensive Example of Play.
I won’t jump straight into a full game. Instead, I’ll be moving counters and playing cards step by step. I will follow the narrative in the example to see how everything fits together. This feels like the right next move—less theory, more hands-on learning.
I’m expecting a few light bulb moments. I anticipate a couple of “ohhh… that’s why” realizations. Probably a mistake or two will happen along the way.
In the next session, I’ll share how that example play went. I will explain what finally clicked. I will also discuss what still felt a little fuzzy.
Onward to actually pushing some cardboard.

Leave a comment